Albion Online Leveling Guide

Updated daily News and Guides

Mountain Territories and Mercenary Warbands in Albion Online

Please read the following carefully, I believe is very useful for you.


Zerging is strong. There is no denying it. This is not a problem in itself. The bigger guilds should have an advantage over smaller guilds.


The problem is that is it nearly impossible for smaller guilds to be able to conquer territory. If they do get to initiate GvG’s, they have a fair shot.


The current mechanics makes it nearly impossible for smaller guilds to actually initiate any GvG if they don’t already have territory. The current suggested changes to the GvG mechanics are all nice and interesting. They don’t suggest anything to balance the fundamental dilemma of “zerg vs small”, however.


I would like to suggest that there are two categories of GvG initiation:
A) The current developer suggestion where zergs can siege up anywhere to initiate a 5v5 GvG. The initiation of very zerg friendly. The resulting 5v5 is balanced and is what we want more of. Let us for the sake of this thread call the territories with these mechanics Plains Territories.
B) “Something else”, which allows for smaller guilds to initiate the actual GvG. This “something else” is what we need to come up with. Let us call the territories with these “other” initiation mechanics Mountain Territories.


Plains Territories
In general, these territories use the current and proposed mechanics:


Initiation
All Zerg friendly stuff. Castles, warcamps and the siege mechanics all fall into this category. If a guild shows up with overwhelming numbers, the defending side has a low chance of preventing the initiation (and in the case of castles, of not losing the territory).


GvG
Currently the dominant type of GvG is the 5v5. I would like plains territories to have bigger fights due to their nature. 10v10 or more would fit the “plains” category better.


Mountain Territories
The mechanics for these territories don’t exist. So this is what we need to come up with.


Initiation
The way I see this working out is with something I’d like to call mercenary warbands. A mercenary warband is basically just a different and more small guild friendly way of launching an attack.


A mercenary warband will offer their services to a guild every 24 hours. They will do this in either the cities or in smaller camps out on the map.


Only one guild can use the mercenary warband per cycle.


In order for a guild to win access to the mercenary band, players will have to participate in a tournament. Each guild can sign up one 5v5 team to participate in the tournament every hour. Once every hour, the competing teams are then matched against each other, so that the current “best” team will be matched against the current 2nd team. Teams 3 and 4 will fight against each other and so forth. The 5v5 takes place on an instanced map.


The winner of the match gets 1 point. The loser gets -1 point.


When the 24 hour cycle runs out, the guild with the most points will be declared the winner.


The winning guild has access to the mercenary warband and has to launch an attack within 12 hours. When this attack is launched, a new tournament starts for a new mercenary warband.


Mercenargy warbands can only launch attacks on mountain territories within a certain range. This is to prevent small guilds from being able to capture large swaths of lands by only using the mercenaries. If you want to hold large swaths of land, you have to have a map presence. Mountain territories are for small elitist guilds. For this reason, only a low number of territories are mountain territories. I’d say one in every 9 territories could be a mountain territory.


GvG
The GvG in mountain territories is the standard 5v5 type. If the enemy used the proposed siege mechanics to initiate the GvG, then the defender gets +40 defender bonus. If the enemy used my proposed mercenary warband mechanic to initiate the GvG, then the defender only gets +20 defender bonus.


Map Design
The map needs to be designed intelligently in accordance with this. Most of the map is “plains”. Plains have 90% plains territories and only 10% mountain territories. In plains areas, maps have 4 exits most of the time, and generally there are fewer choke points. Some smaller areas of the map could be mountainous. Mountainous areas are bigger areas of mountain territories with only a few plains scattered in between them. In mountain areas, maps have only 2 or 3 exits. And the map design provides numerous choke points.


Conclusion

I feel like adding mountain territories to the game would balance the entire “zerg vs small” dilemma. I would allow for zerg guilds to hold big swaths of land, while the smaller guilds can potentially hold a territory or two within that same area. If the map is designed in accordance, it can create an interesting game flow.


The mercenary warband mechanic can be revised. I feel, however, that adding this arena type of PvP to the game and making it very accessible will allow for a much broader audience to actually do GvG’s. As it is right now, I think that only a very small percentage of the player base will ever be able to experience a 5v5.


Let me know what you think. And more guides in UPAlbion.com.

The Innovation of Albion Online

What attracted you to the game? At first look, albion online looks like a garbage, honestly. But as the player dives right in the game, immersing through the vast world of the game, it will become a perfect game, a game that will innovate how MMORPG should work. Honestly, there is nothing to brag about albion online’s gameplay. It is just as simple as picking herbs and eating the directly. But when it comes to the game’s economy and how guild, albion online gold farming, things start to become more complex. It is like planting the picked herb in a furrowed soil.


Farming
Farming is now more realistic. It is like really farming that a player will actually need a pick axe and fishing rod. Unlike, other MMORPG, wolves are the one who drop wood, fine wood, while large wolves drop swords. In albion online, players get log from a tree, meat are obtained through killing rabbits, items are gathered in order to forge a mighty swords.


There is a workbench where a player could craft weapons, armors, and other items.


The Thrill
Commonly, MMO games nowadays are way too easy. It is easy to gain profit, player versus player with no risk. In albion online, upon dying in player versus player, a player could rob a dead player’s body, taking all of his items, which a rare feature in MMO games nowadays.


Albion online is equipment based game. There is no such thing as reflexes or complex combat mechanics. There is only strategy in the economy and exploitation of the vast mechanics of the game.


Guild System
Albion online is one of the best MMORPG games that have a fine guild system. It is developed with guild competition in mind. It is designed for guilds to compete in player kill and economy in order to get gain advantage and overthrow another guild.


Guilds are the basic unit of the game. The more guilds in the game, the more enticing the game would become.


Ok, do you want to join this game? And need some Albion Online Gold? Welcome to our site.

The Current State Of Albion Online

Let's look the current state of Albion Online, it is improving day by day. Despite the vast game content, the developers are constantly releasing new content for the game, which gives the game an edge as a sandbox based MMORPG.


The Current State of Albion: Overall
If this game was released way back year 2006, this game must have dominated the MMORPG genre. It got all the factors that were missing in the MMORPG of 2006 onwards. It allows players to stay and farm at their personal island, it has a player driven economy, it has active competitive community and realistic approach of farming items.


The current version already satisfied players, while the developers are planning to release something big soon.


The Current State of Albion: Community
Hands down on the community, they are all newbie friendly. There are only few players who answer a new player’s question with a joke, players who bully and ignore new players. The community of albion online open handedly entertain any newbie and even invite them to join their guild.


The Current State of Albion: Simplified Gameplay
Albion is simple overall, but vast enough to be complex as the player progresses through the game. The crafting system is easy to understand with no unnecessary features. It will take a lot of man power to monopolize the economy, which is less likely to happen.


Even with simple click and slash gameplay, team work is essential on achieving guild victory.


Remember more Cheap Albion Online Gold in our site.

Skilled Based Game or Gear Which is Albion Key

I have a question is: Albion game skilled based game or it just You gear? Then I will tell you, And if you Buy Albion Online Gold can help you batter experince the game.


We are gvg based guild, we are 10 active players and our guild have 1000gvg (98% yellow zone gvg), and i was looking for strong guild to fight us in yellow zone gvg for practice ( in game global chat), but one of the guys was desperately trying to explain me that is no point train in yellow zones cos all about this game is your gear. I dis agree with him, cos how you explain like example: we fought gvg with lot of guilds some one is coming with enchanted, 7.3 and so on, but we 80% easy winning against them even when we use 4.3 t6 epic ones and similar( ofc we all know that higher gear then t6 / 4.3 is nerfing, but they still have small advantage ).
So how can it be just gear based game?


I think this game based on :
50% – team work
30% – skill to dodge, predict, use and count enemy cool downs
and just 20% – your gear advantage ( let say if we fighting with 6.3 and they 7.3 )


What is You opinion what makes us good in pvp? what matter to be good at it?


I do agree that it is not the same like open world pvp, same surroundings and long time practice makes to coordinate easier, but i think people who done more gvg will be better and in word pvp, just knowing your right position, what do expect from enemies and etc


Gear is only about 10% or even lower.
Skillcap for GvG is not that high either and it’s mostly based on positioning and awareness. You can be really bad with timings, targeting, CD and mana management, but if your position is right you’ll do fine. I’d say skill is about 30% maybe.
Communication is a huge part. I’d group teamplay and communication in one category. Let’s call it Strategy It’s about 30% also.
And finally the most important part. Team composition. I give it a solid 30%, but it seems to play a way larger role.


Wanna win a lot? Get a Greathammer, Longbow, Cursed with Armor Piercer, Claws/Halberd for single target and a solid .2 Druid. You are golden.
We’ve only recently started tracking GvG stats thoroughly (with crazy ass excel sheets and stuff) but it is already obvious that one can win with bad players and good team composition at least as much as good players in a bad comp (double .2 cursed).


To sum it up for you
Gear: 10%
Skill: 30%
Strategy: 30%
Team Composition: 30%

Live in Albion Online Swamp Biome

In Albion Online’s latest developer video, Sandbox Interactive Game Director Robin Henkys and Creative Director Jörg Friedrich outline the studio’s activities since the March Cador update, plans for the Darion update, and the push toward the game’s second beta phase, which Henkys says is on target to begin later this summer.


Of note, the duo says the team has almost completed the swamp biome, In this segment we take a look at what’s currently in the works for Albion Online.


- Frogs
Introducing…*ribbit*… Frogs! These cute little amphibians are pretty much the rabbits of the swamp.


Not everyone is fond of our jumpy new friends, as demonstrated below.


- Swamp Development
The swamps are beautiful and could even be considered romantic, if only they weren’t so smelly!


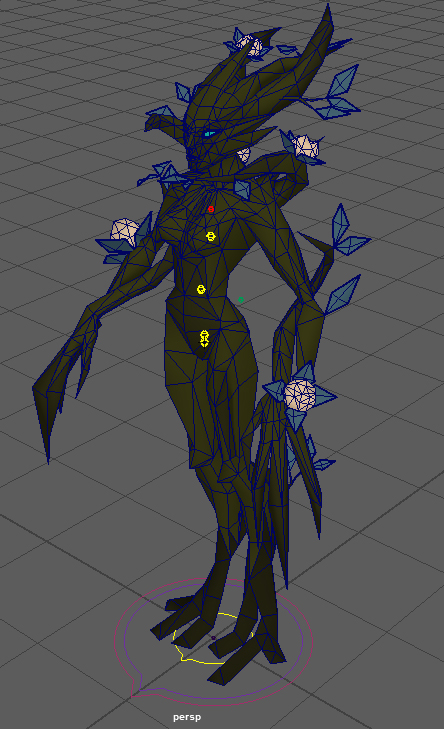
- Spirit of the Swamps


While roaming the swamps, you might encounter this mysterious spirit.


Can’t wait until next week to see more? Click UPAlbion.com.

Some Tips and Tricks for Mirrors of Albion HD


This is Cheats, hints and strategies! It’s very important for you. Mirrors of Albion HD is a new hidden object game that is leading the resurgence of the HOG genre on the Android and iOS platforms. Of course, if you want a better experience just click UPAlbion.com.


To increase your mastery as quickly as you possibly can (and rack up points and coins, of course), play the same stages over and over, making a mental note of where everything is every single time so that you can remember it quickly the next time you play. The quicker you tap items one after the other, the higher your multipliers will be on the stage.


Of course, it always sucks when energy runs out. However, you can get free energy immediately once it runs out. To do this, go to the settings on your phone or other device, and set the time ahead by about an hour or three, and your energy will be fully restored. Do this every time you run out of energy to keep playing forever.


Even better, once you set the time back to normal, you won’t lose the energy that you just gained, and if you didn’t quite restore all of your energy because you didn’t set the time ahead enough, then you’ll get the rest of your energy meter filled up when you set the time back to normal. This way, you can play for as long as you want without having to deal with your phone being days ahead or some other ridiculous total.


Even if it is your first time playing a stage, look around for awhile and spot at least three items before you start tapping on them, so that you can quickly tap them one after the other and get the bonus bar at the top of the screen to fill up. You’ll earn far more points and increase your mastery more quickly this way.

Albion Online Guide to Weapons and Armor in Classless PvP

Someone asked how to tell what your enemies will be doing in PvP. Well, it's hard to tell what defines each type of weapon and armor without clicking through every item on the destiny board, so here's a quick breakdown of what makes each item unique!

Weapons

Q: Signature (Spam) Ability. 1.5-3s CD(or cast time)
Each Weapon Type (sword, bow, fire staff, hammer, etc) will have their own Q ability which is the same across all tiers. Most have a small special effect or characteristic (slow, poison, armor reduction).
Support weapons have a damage option and a heal/shield option. Bow has a second option on T5

W: Utility Ability. 7-10s CD
Each Weapon Type has their own set of 1-3 options (mostly two - one for more damage/healing, one for more special effects). These have special effects such as interrupts, slows, shield, fears, damage over time, dashes, knockbacks.

E: Ultimate (Special) Ability 15-30s CD
Each Weapon Type has a similar flavor or effect, but every weapon has their own Ultimate/Special Ability. Typically 2 of the weapons in a particular Type will have similar effects (broadsword gives armor/mr, claymore also gives armor/mr; staves all have knockbacks; spears have a dash and a pull; bows have AoEs).

Weapon Passive
Each Weapon Type has two passives, but only in their two-handed versions (Tx.2 and Tx.3 for most Types). Think "10% chance to gain damage/attackspeed/bleed/slow/castspeed". Typically one damage boost, one utility boost (attack range or energy or a slow) but it varies.

Identifying Weapons
You'll be able to instantly see if they have a sword, or a bow, or a certain staff, at which point you will know if they're going to be Q spamming a slow or damage. You'll have to remember that certain weapon types have different W abilities for utility, and wait to see if they have it as a damage boost or for utility. You'll have to remember that certain weapons have high dps, certain weapons have stuns and crowd control. You won't be able to tell what passive they have without inspecting them. And last, each weapon has a very different model, so you'll be able to tell what their Ult/Special is going to be.

Full List of Abilities by Devious[1]

Armor
Armor is a little harder - each Armor Type has different abilities, while Armor Material determines the type of defense.
Here's a picture from the forums a few weeks ago that shows all of the armor in the game: armor models, check it out![2]

R: Boost Ability - Helm - 30s CD
Helms give an ability to boost your stats for ~5 seconds - damage, movement speed, or defense, determined by your Armor Type. These give people a short time for surprise burst, sticking power, or tanking.

D: Role (Utility) Ability - Chest - 30s CD
Chest armor gives you an ability to help you fulfill your typical MMO roles in a fight as a mage, fighter, or tank. Light armor helps you survive, medium armor helps you stick around to deal damage, and heavy armor helps you barge in and disrupt the enemy team. These all have both offensive and defensive uses.

F: Speed Boost - Feet - 20s (or 60s) CD
Boots give you a speed boost, they all have the same icon right now so you won't be able to tell which one people have in a fight.

Armor Passive - All
Light armor gives you better spells (increased damage, healing, or cast speed).
Medium armor gives you better sticking power (increased speed, CC resistance, or better CC).
Heavy armor gives you better defense (increased life, armor, or thorns damage).

Armor Types
Heavy armor has high health, armor, and magic resistance.
Medium armor has a 25% damage/healing boost, medium health/armor/magic resistance.
Light armor has a 50% damage/healing boost, and low health/armor/magic resistance.

Armor Styles
Heavy Armor has huge full helms that cover the face, bulky layered chest/legs, and giant shoulder armor.
Medium Armor has open-faced helms, thin/loose chests and sleeves, and small shoulder armor.
Light Armor has scarves, open-faced chest, short sleeves, and no shoulder armor.

Armor Materials - Determined by Chest Material
Plate Armor has ~10% more armor than magic resistance.
Leather Armor has equal armor and magic resistance.
Cloth Armor has ~10% less armor than magic resistance.

Check the size of their shoulders to see what type of chest piece they have, you NEED to know if they are going to be dealing lots of damage or taking lots of damage, and whether or not they can chase you down. Next most important is their helm - full, half, or scarf? This will determine if they can boost their damage, speed, or sticking power. Boots don't really matter, they have the same abilities and a very small damage or utility boost that will probably match the chest or helm.

Full List of Armor Details by Devious[3]

Bonus Info: Tiers
The Good: you can tell which Tier (1-8) people have based on the color of their armor or weapon. The Bad: you can't tell which Class (x.1, x.2, x.3,etc) people have based on the color of their armor or weapon.

T4.1 Heavy Plate is blue and has a power level of exactly Tier 4.1 for it's health, armor, and magic resistsance. T4.2 Heavy Leather is also blue, but has the power level of T5.1 gear. Someone wearing T4.3 Heavy Cloth would have total power level of T6.1 Heavy Plate, leading to slightly hidden power differences.

Weapons are the same: T4.1 Broadswoards are blue, but the T4.2 Claymore (also blue) has a power level equal to the T5.1 Broadsword. A T4.3 Glaive has the power level of a T6.1 Broadsword.

So, in addition to looking at their weapons to see their spells, and armor to see their role, also keep in mind the power spike as you go up in rarity. The more advanced (and unusual) the armor is, the higher the item power.

Power Chart with Developer Explanation at the bottom[4] also by Devious


Want to learn more? Click UPAlbion.com.

Albion Online | The Role of Economy and Currency

Like a real city, all items and buildings in Albion Online are player crafted (with a few exceptions, such as beginner towns, harbours, etc) and resources for making items and buildings can be found in the world. Of course you can also obtain them from other players via trade.


The main currency is Albion Online Silver.


You obtain this by killing enemies in PvE combat. Also, again, you can trade it with other players


Land Ownership


Players can own land in Albion Online: Player Islands, Guild Islands, Player Cities,


Open World Plots (inside of Player Cities) and Open World Guild Territories


You use the land for farming and placing buildings.


You can allow other players to use your buildings, either for free or for a charge, giving you a source to earn money


Once bought, Open World Plots require regular rent payments


Once claimed, Open World Guild Territories and Player Cities require upkeep via food


Player Islands and Guild island do not require rent or upkeep


The role of Albion Online Gold.


Gold is the premium currency of the game


Gold can be bought for real money


Gold can not be directly converted into silver


Gold can be freely traded with other players (in exchange for items, but also in exchange for silver, whatever the other player wants to trade with you really)


Via player trade, you can get gold without spending real money


Gold can be used to buy (once it is implemented) a premium status for your character, which will give you additional silver yield and fame gain, and possibly some other small perks.


Gold can also be used to pay certain in-game expenses instead of using silver, such as the silver cost for crafting an item or for paying the rent for a city plot.


Apart from the premium status and possibly some vanity only items, there is nothing that you can do with gold that you cannot do with silver


Gold cannot be used in the player market place, all trade in the player market trade happens via silver only

Good Idea - Maximizing Albion Silver

Yeah, I think maximizing albion silver per hour is to make money. And is good idea


The key to maximizing your ability to farm the most silver per hour, will depend on your ability to set your character up for such an endeavor. As referenced above, sandbox MMOs are about risk vs. reward. If you get too greedy and go to farm silver without properly setting up your account, you are greatly exposing yourself to failure. Any mistake may result in a death which results in a loss of 33 durability points. If you wear tier 4 and higher gear, this can be a very expensive mistake - death is not an option. Typically, two deaths is all it takes to break all of your gear - which forces you to start over.


The first step is to level your character to at least tier 3 in both gear and weapons. The next step is to farm tier 3 and tier 4 mobs for silver until you have either bought enough tier 3 sets from the AH, or have crafted enough tier 3 sets so that you have a minimum of four complete gearsets in your bank. This way if you lose all your gear, no big deal, just grab another!


You may also want to visit the AH if you plan on farming in PVP lands with tier 4 or higher gear. Buy an invisiblity potion or a speed potion so that if someone attempts to jump your bones, you have a better chance of getting away.


If you find that you are down to your last gearset, then it is time to go back to routine farming until your bank is put back into the proper setup.

Recent News About Albion Online Update

Albion Online is constantly updated, let us look the following main content.


# Morgana Faction Rework


# Faction-themed Furniture: Morgana Mobcamp


# 12 New Weapon Spells


# New Feature: Item Study


# Learning Point System Improvements


# Various Fixes and Improvements


# And, swamping it up!

In this segment we take a look at what’s currently in the works for Albion Online.


- Frogs

Introducing…*ribbit*… Frogs! These cute little amphibians are pretty much the rabbits of the swamp.

Not everyone is fond of our jumpy new friends.


- Swamp Development

The swamps are beautiful and could even be considered romantic, if only they weren’t so smelly!


- Spirit of the Swamps

While roaming the swamps, you might encounter this mysterious spirit.


# Steppe, Dual Swords and More!


- First Glance at the Steppe
The steppes are a dry, rough environment, with an occasional glimmer of life in the form of beautiful oases. Keep your eyes peeled, as more steppe news are coming soon!


- New Weapon: Dual Swords
Beta 2 will include new weapons, and here is a teaser for one of them: Dual Swords! The weapon is still in the prototyping stage, but we can tell you already it will be available in the Sword line and – similar to Dagger Pair – will be considered one item.


- The Little Morgana Room
Ever wondered if Cultists need to use the bathroom? No? Well, here is a picture of their restroom anyway!


- New Animations
The Fireball’s animation got overhauled. Here’s a comparison of new (left) and old (right).


Don't trust anyone moving funky to a Skull orb. Nuff said.


Want to learn more? Click UPAlbion.com.

Albion online: Idea for Guild Vs Guild Warfare

Guild Size
How guild size impacts how you play should be scalable. This means a larger guild just has more of the same thing, not access to more content. This scaling can be introduced in the form of Influence.

Guilds gain 1 Influence per member. Multiple members from the same account (alts) do not increase Influence.

Influence is used to attack and hold territory. You need the available influence to initiate an attack, at which point that influence is locked until the attack is finished. This means how many simultaneous attacks you can perform are limited by your influence.

Territory
These can vary in size and efficiency. Territory size and efficiency need albion silver. Larger Territory requires more influence and the zone determines the efficiency. Red Zone territories are less efficient than their Black Zone counterparts, meaning they cost more influence for what they are.

For example, a Red Zone Small Territory might require 20 Influence; however, the same Territory in a Black Zone would only require 10. This makes Red Zone territory less desirable to larger guilds looking to maximize their Territory capacity, but a 20-man guild might find this ideal.

Territory can be used as Influence when declaring an attack on another Territory. This allows a guild to fight for an “Upgrade”. If you own a 20-Influence Territory and have 10 Influence remaining, you can attack a 30-Influence Territory by using both the available 10 and the 20-Influence Territory. If you claim the new Territory, the 20-Influence Territory is lost and up for grabs by other guilds.

Attacking

As described in the possible new system there will be Nodes with structures that can be captured. The size of the Territory will determine how many of these structures are available for capture and the Influence of the Territory will determine the diminishing returns of attacking forces.
While attacking or defending a Territory the zone grants a combat buff to both sides granting 100% combat effectiveness against the enemy. However, for each additional guild member in the combat zone above the Influence Value of the territory, this buff loses 10% effectiveness.

e.g. A 30-Influence Territory:
1-30 members – 100% Combat Effectiveness
31 members – 90% Combat Effectiveness
32 members – 81% Combat Effectiveness
33 members – 73% Combat Effectiveness
50 members – 12% Combat Effectiveness

This means it becomes very detrimental to commit more combatants than the Territory Influence suggests. Combat Influence directly impacts your damage and your capture time for Nodes. Alliance members will not incur the combat penalty, but will count towards the buff values. This means Alliance members, while remaining competent fighters, will seriously slow any capture attempt while being unable to aid in capture themselves.

A guild can only attempt to capture one Node in a Territory every 24 hours. Once captured, it cannot be re-taken by the defenders for 48 hours. This presents the following combat scenarios:

Small Territory – 2 Nodes
Node 1 is Captured by the Attackers – Protected for 48 Hours
Node 2 is attacked 24 Hours later by Attackers – Successfully Defended
Node 2 is attacked again 24 Hours later – Successfully Defended
Node 1 is also Re-Captured by Defenders
OR
Node 1 is Captured by the Attackers – Protected for 48 Hours
Node 2 is Captured 24 Hours later by Attackers – Protected 48 Hours
Attackers own all Nodes and can attack the Territory – Total time of initial attack, 48 Hours

Medium Territory – 3 Nodes
Node 1 is Captured by the Attackers – Protected for 48 Hours
Node 2 is Captured 24 Hours later by Attackers – Protected 48 Hours
Node 1 is Attacked by Defenders 24 Hours later – Successfully Defended by Attackers
Node 3 is Captured by the Attackers – Protected 48 Hours
Attackers own all Nodes and can attack the Territory – Total time of initial attack, 72 Hours

Multiple parties who have declared war can attempt to take Nodes, but must own all the Nodes to attack the Territory. Defenders can also only Attack one Node in the Territory every 24 hours, the same as the Attackers. The 48 Hour protection allows for an initial advance with larger territories being harder to maintain Node control of during an attack. The defenders would then have the added advantage of simply winning the Territory 5v5 while an Attacker controls all Nodes and wasting their opportunity.

Larger Black Zone Territories could cost upwards of 200 Influence to encourage large-scale PvP. These larger Territories could even use smaller surrounding Territories as their “Nodes”, making their Attack and Defence more intricate.

If you own a Territory and your guild loses members to the point where you cannot afford the territory, you will not lose the territory, but any defending members class as 2 members when it comes to the Combat Effectiveness buff, essentially crippling your defence until your Influence is balanced (either by gaining members or losing territory).


More guide in UPAlbion.


Tips of Albion Online Farming

This farming tips is the best as it won't have to buy any food from the auction house to breed your horses or chickens. Breeding will be explained in a seperate guide.
Farming is a big part of the game right now. It takes a ton of food for guilds to keep their territories up. This is why farming and breeding are currently realy profitable. The only way to get a personal farm is to buy a personal island. You can do this at any city with a harbor


Cities where you can buy an island:
Buccaneers Haven
Smugglers Bay
Fisher's Hold
Journey's End
Breakwater
Seamouth
Freeport


The setup i'm using requires 2 farms and 1 pasture. I'm doing this because it requires quite some food to breed your animals. You can build a farm or a pasture by pressing the "b" button on your keyboard and go to the farming tab. Once you have placed your farm or pasture you have to gather the required resources to build them. A farm requires 15 T1 Stone and 15 T1 Wood. A pasture requires 25 T1 Wood, 25 T1 stone, 25 T2 refined wood, 25 T2 refined stone. This gets us to a total of 40 T1 wood, 40T1 Stone, 25 T2 Wood, 25 T2 Stone.


Once you have built the farms and pasture you have to get some seeds to make carrots. You can go out and kill some mobs to try and find seeds but the fastest way is to buy them at the Auction House. A farm can have a maximum of 9 seeds. If you have the silver to buy 18 seeds go ahead and buy them.


After buying the seeds it's time to head back to your farm. You can plant the seeds by clicking them in your inventory and pressing the "Place" button.


After planting the seeds all you have to do is wait for the time to pass, go ahead and gather some resources or slay some mobs while you wait.


Once the carrots have grown, you can harvest them by clicking on them. When harvesting them you will get some fame and after 18 patches you should be able to breed chickens.


To learn the more guides please click UPAlbion.com.

My Notes About Albion Online

I summed up some notes that may be also helpful for you.


- Always join a guild with at least 3 people inside it to gather higher tier resources to be safer. Always look at the map to see what resources are there.


Destiny Board
- Do not do destiny board all by yourself, you suppose to team up with your guild, so the other guild member will do some job for you, so you do not need to do everything by yourself. Therefore, you do not need to do a lot of destiny board. Should do only 2x Gathering, 2x Refining, 3x Crafting, and 4x Fighting in the destiny board.


Death and PVP Combat
- Always build extra combat equipment and put it in some banks around your area incase you die, so you can get back your items when you died if you go back to your bank and get your other armor to go back and get your dropped item back.
- Sometimes when you use shot distance melee weapon they can kill you before you even reach to them in Guild vs. Guild.
- Solo player should equip self- healing and tank equipment, because your health is the most important.
- You should be with a group that defenses you and you should use a Ox to carry your heavy stuff to transfer bank to another bank in a safe zone.
- Can click Details tab that is next to the inventor to see your combat stats.


Trading And Money Management
- Never sell out or trade out with your best or rare stuff unless you have extras.
- Do not kill low tier mobs for money, because low tier mobs are hard to find when everyone comes and kills the low tier mobs. Therefore, you should have a Guild group to go to higher tier PVP area to kill higher tier mobs for money.


Crafting
- Always Salvage your extra items instead of selling it to rebuild it again to gain more crafting experience fame.
- Always add the boot spell with Run, and have no sprint.
- Do not add reflecting armor spells if you are a tank, because you do not revive a lot of damage.


Others
- Hold left mouse to walk.
- When you equip with pickaxe you can hit q to equip your best weapon.
- Hit A to mount.
- How to target heal? Alt or Option to heal target. F1 to heal whole party target. F4 to heal single party member target.
- To whisper in the game you type in /w player name
- To talk to a guild then you type in /G


At last, Good luck.

Albion Online -Tree of Savior's Leveling Guide 50 ~ 200 [ 2 ]

List of Side quests:

Royal Mausoleum 2F - Level 84
Baron Allerno - Level 84
Come here to farm Popolions for Strength Pendant recipe
Kill Orange Hamming for Hamming Leaf x12
Myrkiti Farm - Level 86
Royal Mausoleum 3F - Level 87
Aqueduct Bridge Are - Level 89
Side note to also go to Greene Manor and get the Travel statue located at the top of the map.
Royal Mausoleum 4F - Level 90
Tenants Farm - Level 92
Royal Mausoleum 5F - Level 93
Stele Road - Level 96
Goddess' Ancient Garden - Level 99
Crystal Mines Secret Floor- Level 100
Escanciu Village - Level 103
Entrance to Katleen Forest - Level 106
Decent farming spot if needed at Purple Fountain
Fedimian Suburbs - Level 107
Make a trip into Fedimian to pick up the statue for quick travel
Owl Burial Grounds - Level 109
Polinkis Forest - Level 112
Mage Tower - Level 113
Saknis Plains - Level 114
Mage Tower 2F - 116
Mage Tower 3F - 119
Dvasia Peak - Level 120
Farm the Treegools here, you will need 20 Treegool Stems before you leave the area.
Sunset Flag Forest - Level 123
Farm the Cronewts here, you will need 16 Cronewt Bones before you leave the area.
Mage Tower 4F - Level 123
Starving Demon's Way - Level 121
Pilgrim Path - Level 124
Mage Tower 5F - Level 126
Altar Way - Level 127
Forest of Prayer - Level 130
Residence of the Legwyn Family - Level 132
Apsimesti Crossroads - Level 133
You can come here at 129+ to start grinding Rusty Old Hooks for the Lapis Katzbalger Recipe.
Main Chamber - Level 137
Grand Corridor - Level 140
Penitence Route of Great Cathedral - Level 143
Sanctuary - Level 145
Greene Manor - Level 149
Demon Prison - Level 151
This is the last grind spot that's worth a damn in the game and so we want to to utilize this spot as best as possible, by gaining a few levels, then going to do quests once you've reached a new bracket and then back again. You'll basically be grinding here from level 145-150 until 160, maybe 165.
Shanton Farm - Level 152
Stop grinding at Demon Prison once you reach this level to pick and complete all the quests and then go back to grinding.
Demon Prison D2 - Level 154
Stop grinding at Demon Prison once you reach this level to pick and complete all the quests and then go back to grinding.
Shanton Resevoir - Level 155
Stop grinding at Demon Prison once you reach this level to pick and complete all the quests and then go back to grinding.
Demon Prison D4 - Level 157
Stop grinding at Demon Prison once you reach this level to pick and complete all the quests and then go back to grinding.
Dina Bee Farm - Level 160
Stop grinding at Demon Prison once you reach this level to pick and complete all the quests and then go back to grinding.
Demon Prison D3 - Level 160
Side Note: Another Demon's Prison Exists, it is located in the portal to the north of Shanton Reservoir, however the mob density and mob types here aren't that great but could potentially be a decent spot if you have nowhere else to go.
Vilna Forest - Level 163
Stop grinding at Demon Prison once you reach this level to pick and complete all the quests and then go back to grinding.
Demon District D5 - Level 163
Stop grinding at Demon Prison once you reach this level to pick and complete all the quests and then go back to grinding.

After you’ve finished grinding at Demon Prison and reached 165ish, you can basically pop all your EXP cards and quest all the way to 200, congratulations on your max level character!
(if you haven’t saved many EXP cards, buckle in for some not-so-fun grinding to fill out those gaps.)

Uskis Arable Land - Level 166
Spring Light Woods - Level 169
Glade Hillroad - Level 173
Viltis Forest - Level 176
Roxona Agency West Building - Level 178
Laukyme Swamp - Level 179
side note to grab the Statue in Mokusul Chamber located in the top right
Roxona Angency East Building - Level 182
Verkti Square - Level 184
Roxona Market - Level 187
Mokusul Chamber - Level 188
Ruklys Street - Level 190
Underground Grave of Ritinis - Level 191
Downtown - Level 193
Videntis Shrine - Level 194
Inner Enceinte District - Level 196
Valius's Eternal Resting Place - Level 197 to 200


I hope these guides can help you, Good Luck!

Albion Online -Tree of Savior's Leveling Guide 50 ~ 200 [ 1 ]

These tips are step by step tips basiclly on how to optimally gain the most efficient experience possible so that when you arrive the higher echelon of levels you won't be hit by the Experience Wall very hard. Let us continue to review the Guild from Level 50 to level 200.

Guardian's Graveyard - Level 50 to 53
You basically want to get here by level 50ish and grind until level 56ish (or until you get both collossi and Didel recipe), killing Cronewts are also a good idea because you will need their Bones later on, but don't focus on them as you will have a better chance to get these later.
Come here to farm 2x Colossus + Didel Colossus Recipe. Unfortunately if you’re late/not rushing Guardian’s Graveyard has a tendency to be full and you’ll have to either skip this zone or wait.

Septyni Glen - Level 55
As always follow along the main questline and make sure you explore the map 100% and talk to every NPC you encounter to pick up all side quests.
List of Side quests:
Drugys Courtyard’s Binding Magic Circle - Level 55
Vapsva Vacant Lot’s Binding Magic Circle - Level 55
You should be arriving in Gate Route with an additional XX

Gate Route - Level 58
At this point don’t try to grind because you will have a new section of zones after the next three, just get the quests done as quickly as you can and move on.
As always follow along the main questline and make sure you explore the map 100% and talk to every NPC you encounter to pick up all side quests.
List of Side quests:
Fight Poison with Poison (steps 1 - 4) - Level 58
Last Warning of the Beholder - Level 58
My Ring! - Level 58
Playing with Fire (steps 1 -3) - Level 58
Beholder’s Careful Trick (might not be working?) - Level 58
In the name of the Faith (steps 1 - 4) - Level 59

Sirdelga Forest - Level 61
As always follow along the main questline and make sure you explore the map 100% and talk to every NPC you encounter to pick up all side quests.
List of Side quests:
Caught in the Middle - Level 61
Don’t Panic - Level 61
Some Help - Level 61
Something Blasphemous - Level 61
The Art of Interference - Level 61
Unexpected Research - Level 61

Kvailas Forest - Level 64
As always follow along the main questline and make sure you explore the map 100% and talk to every NPC you encounter to pick up all side quests.
List of Side quests:
Purify Kvailas Forest (steps 1 - 2) - Level 64
Root of Sviesa Hill Areas - Level 64
Root of Tankinta Vacant Lot - Level 64
The Attack of the Infro Holders - Level 64

Gateway of the Great King - Level 58
As always follow along the main questline and make sure you explore the map 100% and talk to every NPC you encounter to pick up all side quests.
List of Side quests:
Crazy Archivist (steps 1 - 3) - Level 58
Eyes of Zachariel (steps 1 - 2) - Level 58
Gorath’s Concern (steps 1 - 3) - Level 58
Historian Kepeck (steps 1 - 3) - Level 58
Historian’s Trick - Level 58
Inheritance of the Royal Family (steps 1 - 2) - Level 58
Jonas’ Medicine (steps 1 - 3) - Level 58
New Researcher’s Favor (steps 1 - 3) - Level 58
Returned Memories - Level 58

Ramstis Ridge - 61
As always follow along the main questline and make sure you explore the map 100% and talk to every NPC you encounter to pick up all side quests.
List of Side quests:
Data of Sculptor Hilda (steps 1 - 3) - Level 61
Mop up the Forger (steps 1 - 4) - Level 61
Recruiting Mercenaris (steps 1 - 2) - Level 61
Release the Pasaga Cliff seal in Ramstis Ridge - Level 61
Remove the seal on the left of Collapsed Sanctum - Level 61
Remove the seal on the way to the Collapsed Sanctum - Level 61
Seal of the Royal Family (steps 1 - 4) - Level 61

Overlong Bridge Valley - Level 64
As always follow along the main questline and make sure you explore the map 100% and talk to every NPC you encounter to pick up all side quests.
List of Side quests:
Effective Painkillers - Level 64
Find the Supply Commander’s Junior - Level 64
Information about Saugas (steps 1 - 4) - Level 64
Lindt’s Matters - Level 64
Merchant’s Mercenary - Level 64
Preapre to Return Home - Level 64
The Stone Pillar Above Alkune Stairway - Level 64
The Keys Within the Spatial Gap - Level 64
The Stone Pillar at Overlong Bridge - Level 64
The Stone Pillar Beneath Alkune Stairway - Level 64
Unfinished Commission (steps 1 - 3) - Level 64

Akmens Ridge - Level 67
As always follow along the main questline and make sure you explore the map 100% and talk to every NPC you encounter to pick up all side quests.
List of Side quests:
Antidote - Level 67
Business Interference (steps 1 - 2) - Level 67
Missing Researcher (steps 1 - 5) - Level 67
One Step Closer to the King’s Legacy - Level 67
Treasure Hunting (steps 1 - 5) - Level 67


Tiltas Valley - Level 69
As always follow along the main questline and make sure you explore the map 100% and talk to every NPC you encounter to pick up all side quests.
List of Side quests:
Ardor for Study (steps 1 - 3) - Level 69
Fishing on Land (steps 1 - 2) - Level 69
Raided Historian - Level 69
Royal Mausoleums’ Secret Location - Level 69
Strange Stone - Level 69
The First Mission - Level 69


Royal Mausoleum Constructor's Chapel - Level 73 (73-75)
If you are rushing, you’ll want to get here at 70 (or even as early as 65+) ASAP and farm all the way to 80+. You're going to lose some efficiency by rushing here, however getting to the lantern rooms before they become over crowded is ideal - if you're starting off late or behind the exp curve I would just suggest doing the lower floors or grinding in Tiltas Valley/Rukas Plateau. The main & lower floors of the Constructor’s Chapel are also very valid spots for grinding provided the place isn’t packed.

Gytis Settlement - Level 69
As always follow along the main questline and make sure you explore the map 100% and talk to every NPC you encounter to pick up all side quests.
List of Side quests:
Gytis’ Worry - Level 69
Loiuse’s Farmland (steps 1 - 3) - Level 70
Terrible Harvest (steps 1 - 2) - Level 70
Monsters after the Supplies (steps 1 -2) - Level 71
Secure the Farmland - Level 71

Rukas Plateau - Level 73
As always follow along the main questline and make sure you explore the map 100% and talk to every NPC you encounter to pick up all side quests.
List of Side quests:
Request of an Adventurer (steps 1 - 2) - Level 73
The Eternal adventure (steps 1 - 3) - Level 73

King's Plateau - Level 76
As always follow along the main questline and make sure you explore the map 100% and talk to every NPC you encounter to pick up all side quests.
List of Side quests:
Stoneman Pipoti’s Friend - Level 76
Treasure Map of the Stonemason’s Family (steps 1 - 4) - Level 76

Zachariel Crossroads - Level 78
As always follow along the main questline and make sure you explore the map 100% and talk to every NPC you encounter to pick up all side quests.
List of Side quests:
Beholder of Sesija Entrance - Level 78
Sentinel’s Favor (steps 1 - 2) - Level 78
Treasure Chest of Hogmas - Level 78

Royal Mausoleum - Level 81
There are no actual NPCs that give side quests in the Royal Mausoleum, instead you will have to interact with certain static objects to pick them up.
As always follow along the main questline and make sure you explore the map 100% and talk to every NPC you encounter to pick up all side quests.


To be continued...

Albion Online - Some Tips For Starters

The tips maybe to help you.


1.Depends really how many hours a day you playing - if you don't spend whole day on 1 game you don't really need 2 characters there is no way you will run out of learning points this quick.


2.Try to make friends who can explain you how it works, focus on 1 thing at a time. Being a mage or whatever you want to be. Try getting groups all the time as it is far better than doing things on your own. Experiment. But don't waste all your learning points on stupid things. (use them on your main spec line from tier 3 or 4) - weapon and chest armor is best to begin with.

3.Just get rolling to tier 4 or so and you can start doing 5man dungeons.
If you want to be appreciated and wanted for groups, be a tank or healer (you can do this as your alt spec and then switch back and forth, but that delays your main build)

4.Join a guild so you have people to hang out with and ask for advice.
also have two characters: one for resource gathering/crafting, and another for combat.learning points run out super fast (especially with crafting) and you won't have enough to do both on the same character.